sFTP upload method
sFTP upload method
IMPORTANT
- The sFTP upload method is only available to contributors who have published at least 1,000 resources.
- Magnific now uses a single sFTP server for all uploads. FTP is no longer supported and your previous access no longer works, so use the new credentials described below.
- Files that you don't send for review are deleted 6 months (180 days) after you upload them.
To upload your files using sFTP, follow these steps:
1. Download and install an sFTP client
You need a client that supports SFTP (SSH File Transfer Protocol), such as FileZilla, WinSCP (Windows) or Cyberduck (Mac/Windows). On Linux and macOS, you can also use the Terminal.
2. Get your sFTP credentials
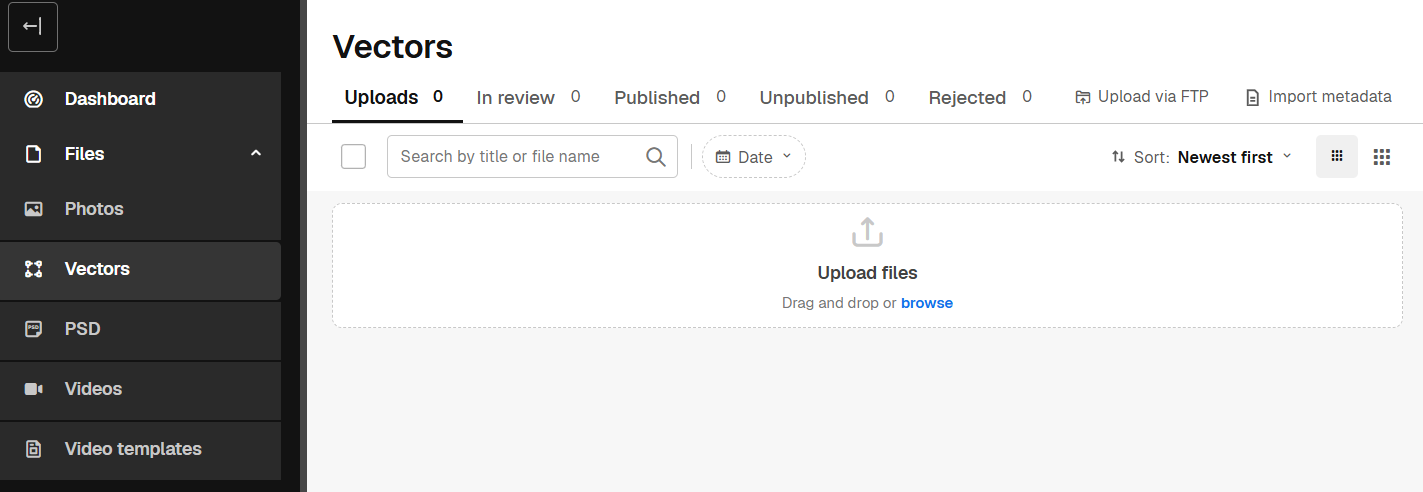
- In your contributor dashboard, open Files and select the resource type you want to upload (for example, Vectors).
- Click Upload via FTP at the top of the Files manager.
The Upload via FTP window shows your Server/Host, Port and User, each with its own copy button. Click Get password to generate your password and copy it.
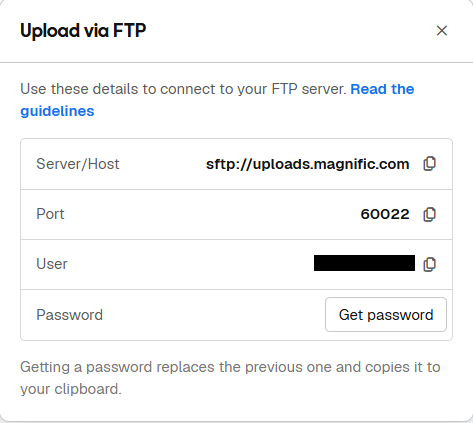
Each time you click Get password, a new password is created and the previous one stops working. Always use the latest one you copied.
3. Connect to the sFTP server
Whatever client you use, these are the connection settings:
- Server/Host: sftp://uploads.magnific.com
- Port: 60022
- Protocol: SFTP – SSH File Transfer Protocol
- User: your contributor username
- Password: the one you copied with Get password
FTP on port 21 no longer works. Use only SFTP on port 60022.
FileZilla
- Go to File → Site Manager and click New site.
- In Protocol, select SFTP – SSH File Transfer Protocol.
- In Host, enter sftp://uploads.magnific.com, and in Port, 60022.
- In Logon Type, select Normal and enter your User and the password you copied with Get password.
- Click Connect.
WinSCP (Windows)
- Open WinSCP. The Login window opens with a new site.
- In File protocol, select SFTP.
- In Host name, enter uploads.magnific.com, and in Port number, 60022.
- Enter your User name and the password you copied with Get password.
- Click Save to keep the session, then Login.
Cyberduck (Mac/Windows)
- Click Open Connection.
- In the drop-down menu, select SFTP (SSH File Transfer Protocol).
- In Server, enter uploads.magnific.com, and in Port, 60022.
- Enter your Username and the password you copied with Get password.
- Click Connect.
Terminal (Linux/macOS, advanced users)
- Open the Terminal and type:
sftp -P 60022 your_username@uploads.magnific.com - Enter the password you copied with Get password.
- Open the folder for the resource type you're uploading, for example:
cd vector - Upload your files with
put file.jpg(one file) ormput *.jpg(several files). - Type
byeto close the connection.
4. Upload your files
Once you're connected, you'll see five folders, one for each resource type: photo, psd, vector, video and video_template.
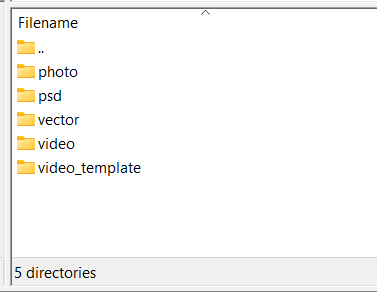
Drag and drop each file into the folder that matches its type. Files uploaded to the wrong folder will be rejected or fail to process. Keep in mind that:
- You'll always see all five folders, but you can only upload to the ones for the resource types enabled on your account. In the others, you can view and download your existing files, but not upload new ones.
- You can't upload files to the main (root) folder. Open one of the five folders first. Inside them, you can create subfolders.
- Each file can be up to 20 GB.
- Files whose names start with a dot (such as .DS_Store) and executable or script files (such as .exe, .sh, .js or .html) are not accepted.
The files you upload via sFTP sync automatically and appear in the Uploads tab of your dashboard. You don't need to synchronize anything manually.
To add metadata, use Import metadata in the Files manager to upload a CSV file, or add keywords directly from your dashboard, before you send your files for review.
5. File requirements
Depending on their format, all your files must meet the following criteria:
Photo requirements
- All photos must include integrated titles and keywords in the JPG file (read this article to learn how to add titles and keywords to photos).
- Format: JPG, between 0.5 MB and 80 MB.
- Size: between 2000 px and 10000 px on each side.
- Color mode: sRGB, Adobe RGB or ProPhoto RGB.
- No watermarks or brand names must be visible.
- No brand/company logos must be visible.
- A model release must be included for photos with people, and a property release for photos taken on private property.
PSD requirements
- PSD files must be between 1.5 MB and 325 MB.
- Each PSD needs a JPG preview file with the same name, between 0.5 MB and 80 MB.
- Preview files must be between 2000 px and 10000 px on each side.
- Color mode can be sRGB, Adobe RGB, ProPhoto RGB or P3.
Vector requirements
- Upload an EPS file and a JPG preview with the same name. Both are required.
- The EPS file must be between 0.5 MB and 80 MB, in RGB color mode.
- The JPG preview must be between 2000 px and 10000 px on each side.
- Optionally, you can also include an .ai or .svg file. It must have the same name as the EPS and be in the same folder (for example, flowers.eps, flowers.jpg and flowers.ai).
6. Once your files have been uploaded
Review your files in the Uploads tab of your dashboard. Check that they meet the technical requirements and make any necessary corrections before clicking Submit.
Files that you don't send for review are deleted 6 months (180 days) after you upload them.